반응형
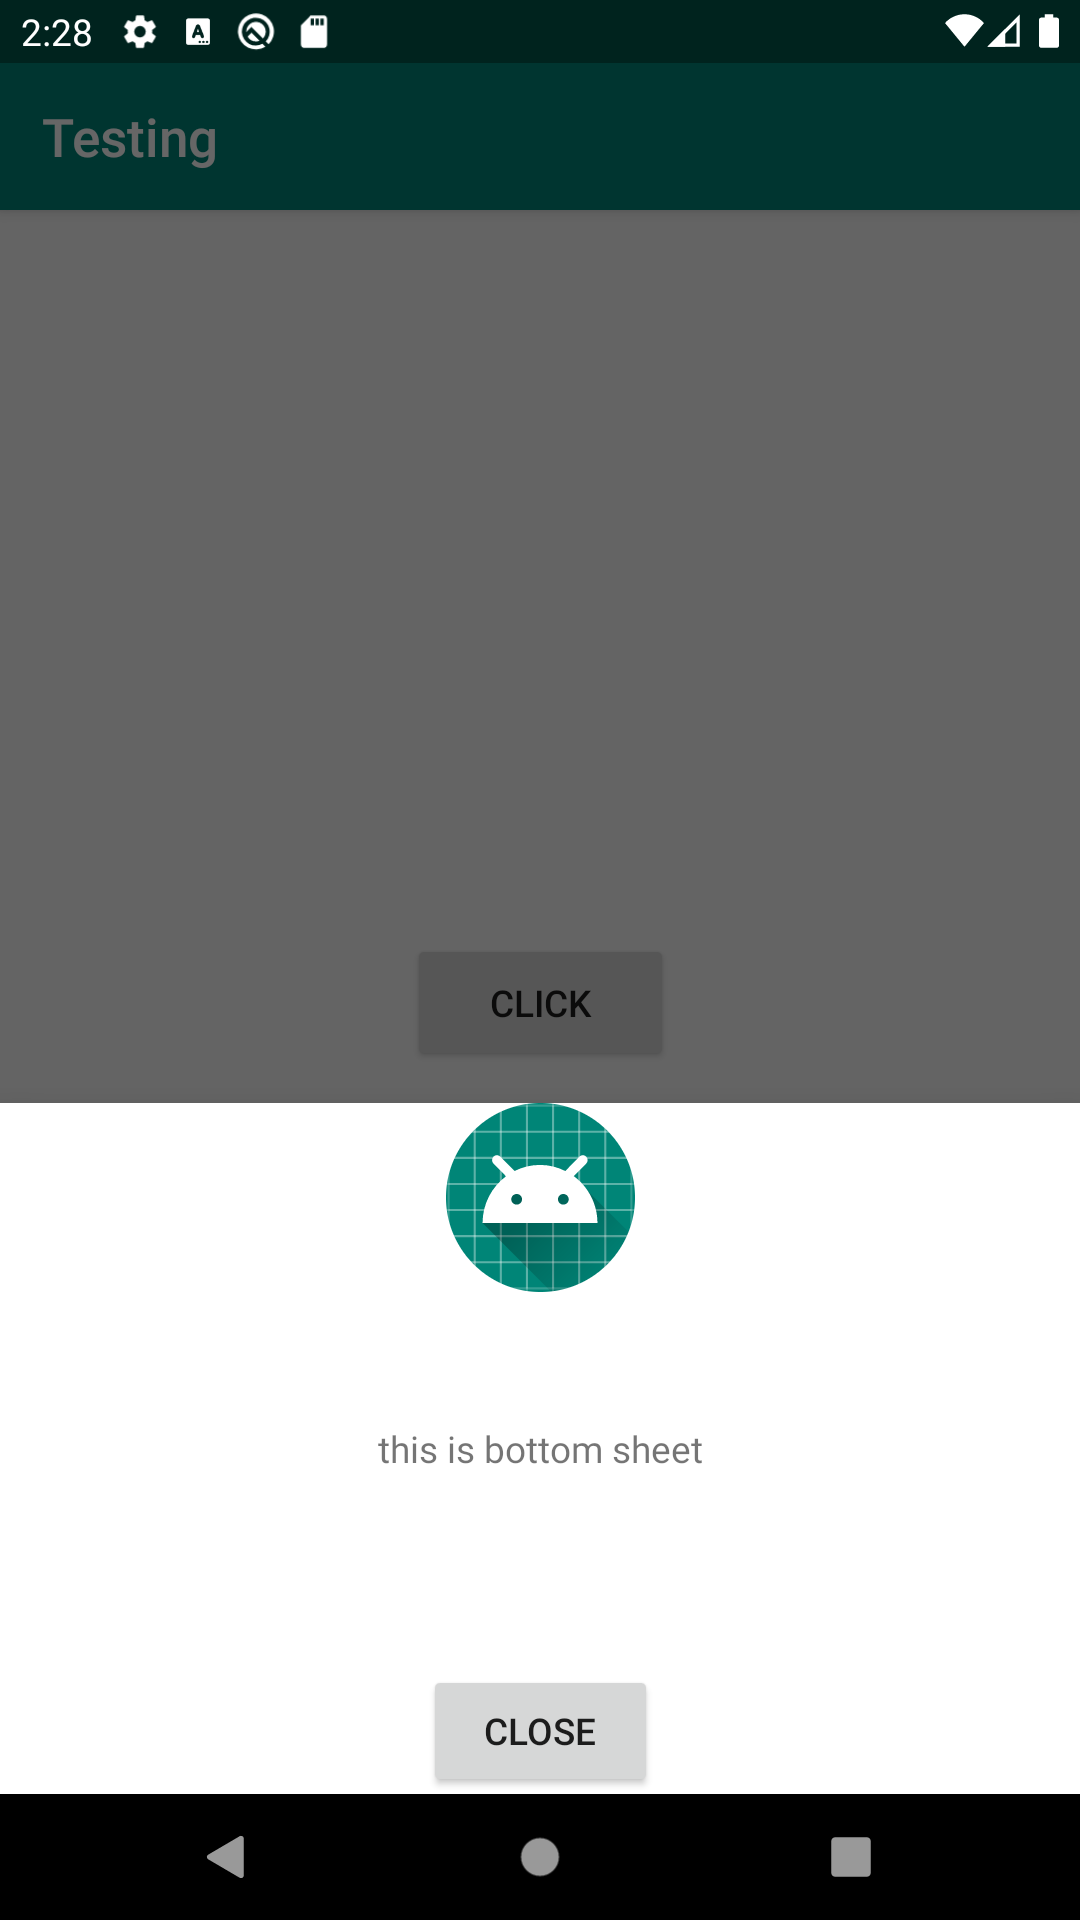
BottomSheetDialog는 일반 fragment보다 훨씬더 쉽게 만들 수 있다.
바로 아래 코드를 통해 확인해보자.
<activity_main.xml>
<?xml version="1.0" encoding="utf-8"?>
<androidx.constraintlayout.widget.ConstraintLayout xmlns:android="http://schemas.android.com/apk/res/android"
xmlns:app="http://schemas.android.com/apk/res-auto"
xmlns:tools="http://schemas.android.com/tools"
android:layout_width="match_parent"
android:layout_height="match_parent"
tools:context=".MainActivity">

<Button
    android:id="@+id/start_button"
    android:layout_width="100dp"
    android:layout_height="50dp"
    app:layout_constraintTop_toTopOf="parent"
    app:layout_constraintBottom_toBottomOf="parent"
    app:layout_constraintStart_toStartOf="parent"
    app:layout_constraintEnd_toEndOf="parent"
    android:text="click"
    />

</androidx.constraintlayout.widget.ConstraintLayout>
<bottom_sheet_layout.xml>
<?xml version="1.0" encoding="utf-8"?>
<androidx.constraintlayout.widget.ConstraintLayout xmlns:android="http://schemas.android.com/apk/res/android"
    android:layout_width="match_parent"
    android:layout_height="match_parent"
    xmlns:app="http://schemas.android.com/apk/res-auto">

    <ImageView
        android:layout_width="wrap_content"
        android:layout_height="wrap_content"
        android:src="@mipmap/ic_launcher_round"
        app:layout_constraintStart_toStartOf="parent"
        app:layout_constraintEnd_toEndOf="parent"
        app:layout_constraintBottom_toTopOf="@id/text"
        android:layout_marginBottom="50dp"/>
    <TextView
        android:id="@+id/text"
        android:layout_width="wrap_content"
        android:layout_height="wrap_content"
        android:text="this is bottom sheet"
        app:layout_constraintStart_toStartOf="parent"
        app:layout_constraintEnd_toEndOf="parent"
        app:layout_constraintTop_toTopOf="parent"
        app:layout_constraintBottom_toBottomOf="parent"/>

    <Button
        android:id="@+id/close_btn"
        android:layout_width="wrap_content"
        android:layout_height="wrap_content"
        android:text="CLOSE"
        app:layout_constraintStart_toStartOf="parent"
        app:layout_constraintEnd_toEndOf="parent"
        app:layout_constraintBottom_toBottomOf="parent"/>
</androidx.constraintlayout.widget.ConstraintLayout>
위와 같이 두개의 기본 코드를 만들어주자.
mainActivity에서 버튼을 누르면 바로 BottomSheetDialog가 나타나도록하는 방식이다.
<MainActivity.java>
package com.demo.testing;

import androidx.appcompat.app.AppCompatActivity;

import android.os.Bundle;

public class MainActivity extends AppCompatActivity {
    private static final String TAG = "CROCUS";

    @Override
    protected void onCreate(Bundle savedInstanceState) {
        super.onCreate(savedInstanceState);
        setContentView(R.layout.activity_main);

        findViewById(R.id.start_button).setOnClickListener(v -> {
            MyBottomSheetDialog bottomSheetDialog = new MyBottomSheetDialog();
            bottomSheetDialog.show(getSupportFragmentManager(), "myBottomSheetDialog");
        });
    }
}
<MyBottomSheetDialog.java>
package com.demo.testing;

import android.os.Bundle;
import android.view.LayoutInflater;
import android.view.View;
import android.view.ViewGroup;

import androidx.annotation.NonNull;
import androidx.annotation.Nullable;

import com.google.android.material.bottomsheet.BottomSheetDialogFragment;

public class MyBottomSheetDialog extends BottomSheetDialogFragment {
    private View view;

    @Nullable
    @Override
    public View onCreateView(@NonNull LayoutInflater inflater, @Nullable ViewGroup container, @Nullable Bundle savedInstanceState) {
        view = inflater.inflate(R.layout.bottom_sheet_layout, container,  false);

        view.findViewById(R.id.close_btn).setOnClickListener(v -> dismiss());

        return view;
    }
}
순식간에 모든 코드가 끝이난다.
메인에서 버튼을 눌렀을때 생성 후 show만 해주면 바로 나타나게된다.


반응형
'Basic > Android' 카테고리의 다른 글
| Kotlin 기본 변수 선언 (0) | 2021.07.26 |
|---|---|
| Android BottomSheetDialog 크기 조절하기 (0) | 2021.07.10 |
| post runnable과 layout과의 관계 (0) | 2021.06.28 |
| Android에서 chips를 사용하는 방법 (0) | 2021.03.29 |
| ColorStateList 사용 예제 (0) | 2021.03.29 |