반응형
JUnit Rule이란 ?
JUnit Rule은 테스트 케이스를 실행하기 전/후에 추가 코드를 실행할 수 있도록 도와준다.
즉, @Before와 @After로 선언된 메서드에서도 실행 전후처리로 코드를 넣을 수 있지만,
JUnit Rule로 작성하면 재사용하거나 더 확장 가능한 기능으로 개발할 수 있는 장점이 있다.
즉, 요약하자면
- Rule은 테스트 클래스에서 동작 방식을 재정의 하거나 쉽게 추가하는 것을 가능하게 한다.
- 사용자는 기존의 Rule을 재사용하거나 확장하는 것이 가능해진다.
Rule의 종류
1. TemporaryFoler Rule
- 임시 폴더, 파일들을 생성할 수 있다.
- 테스트가 모두 끝난 후 삭제한다.
- 기본적으로 resource를 삭제하지 못하는 경우 어떠한 exception도 반환하지 않는다.
package com.example.myapplication;

import org.junit.Rule;
import org.junit.Test;
import org.junit.rules.TemporaryFolder;

import java.io.File;
import java.io.IOException;

import static org.hamcrest.MatcherAssert.assertThat;
import static org.hamcrest.Matchers.is;

public class MyTest {
        @Rule
        public final TemporaryFolder folder = new TemporaryFolder();

        @Test
        public void testUsingTempFolder() throws IOException {
            File createdFile = folder.newFile("myfile.txt");
            File createdFolder = folder.newFolder("subfolder");

            System.out.println(createdFile);
            System.out.println(createdFolder);

            assertThat(2, is(folder.getRoot().list().length));
        }
}
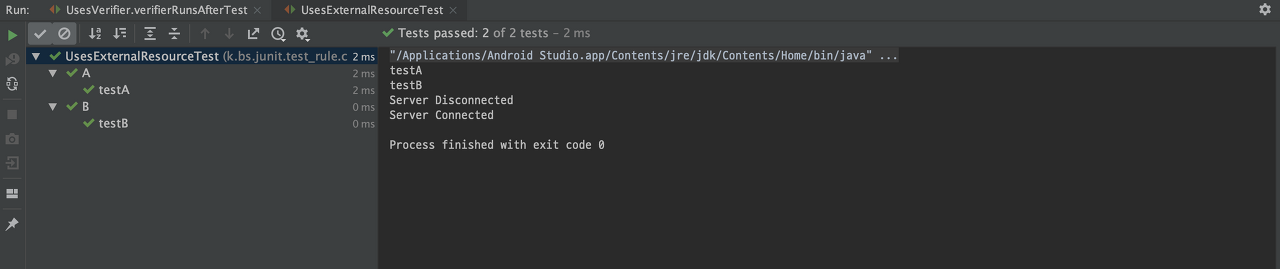
2. ExternalResources Rule
- 외부 Resource(DB Connection, File, Socket) 초기화 / 반환을 관리한다.
- 특정 자원을 다른 테스트 케이스에서 재사용할 때 유용하다.
package com.example.myapplication;

import org.junit.AfterClass;
import org.junit.AssumptionViolatedException;
import org.junit.Rule;
import org.junit.Test;
import org.junit.rules.ExternalResource;

public class MyTest {
    private Server myServer = new Server();

    @Rule
    public final ExternalResource resource = new ExternalResource() {
        @Override
        protected void before() {
            myServer.connect();
        }

        @Override
        protected void after() {
            myServer.disconnect();
        }
    };

    @Test
    public void serverTest() {
        System.out.println("Server test");
    }

    public static class Server {
        public void connect() {
            System.out.println("connect...");
        }

        public void disconnect() {
            System.out.println("disconnect...");
        }
    }
}
3. ErrorCollector Rule
- 에러가 발생하더라도 지속적으로 테스트를 진행하게 도와주는 Rule이다.
package com.example.myapplication;

import org.junit.Rule;
import org.junit.Test;
import org.junit.rules.ErrorCollector;

public class MyTest {
    public static class UsesErrorCollectorTwice {
        @Rule
        public final ErrorCollector collector = new ErrorCollector();

        @Test
        public void errorTest() {
            collector.addError(new Throwable("first thing went wrong"));
            collector.addError(new Throwable("second thing went wrong"));
        }
    }
}
4. Verifier Rule
- 테스트 자체를 검증하는 assert와는 다르게, 테스트 케이스 실행 후 만족해야하는 환경조건이나 Global조건(객체들의 종합 상태)을 검사하는데 사용된다.
package com.example.myapplication;

import org.junit.Rule;
import org.junit.Test;
import org.junit.rules.Verifier;

import static org.hamcrest.MatcherAssert.assertThat;
import static org.hamcrest.Matchers.is;

public class MyTest {

    private static String mSequence = "";

    @Rule
    public final Verifier collector = new Verifier() {
        @Override
        protected void verify() {
            mSequence += "Verify";
            System.out.println("verify : " + mSequence);
        }
    };

    @Test
    public void example() {
        mSequence += "test";
        System.out.println("example : " + mSequence);
        assertThat("test", is(mSequence));
    }

    @Test
    public void verifierRunsAfterTest1() {
        System.out.println("verifierRunsAfterTest1 : " + mSequence);
        assertThat("testVerify", is(mSequence));
    }

    @Test
    public void verifierRunsAfterTest2() {
        System.out.println("verifierRunsAfterTest2 : " + mSequence);
        assertThat("testVerifyVerify", is(mSequence));
    }
}
해당 코드를 보면 하나의 test를 진행할 때마다
Rule의 Verify 메서드가 호출됨을 알 수 있다.
5. TestWatcher
- 테스트 Interceptor (starting, succeeded, failed , finished)을 intercept한다.
package com.example.myapplication;

import org.junit.AfterClass;
import org.junit.AssumptionViolatedException;
import org.junit.Rule;
import org.junit.Test;
import org.junit.rules.TestRule;
import org.junit.rules.TestWatcher;
import org.junit.runner.Description;
import org.junit.runners.model.Statement;

import static org.junit.Assert.fail;

public class MyTest {
    private static String mWatchedLog = "";

    @Rule
    public final TestRule watchman = new TestWatcher() {
        @Override
        public Statement apply(Statement base, Description description) {
            return super.apply(base, description);
        }

        @Override
        protected void succeeded(Description description) {
            mWatchedLog += description.getDisplayName() + " " + "success!\n";
        }

        @Override
        protected void failed(Throwable e, Description description) {
            mWatchedLog += description.getDisplayName() + " " + e.getClass().getSimpleName() + "\n";
        }

        @Override
        protected void skipped(AssumptionViolatedException e, Description description) {
            mWatchedLog += description.getDisplayName() + " " + e.getClass().getSimpleName() + "\n";
        }

        @Override
        protected void starting(Description description) {
            super.starting(description);
        }

        @Override
        protected void finished(Description description) {
            super.finished(description);
        }
    };

    @AfterClass
    public static void teardown(){
        System.out.println("===== Show Logs =====");
        System.out.println(mWatchedLog);
    }

    @Test
    public void fails() {
        fail();
    }

    @Test
    public void test_success() {
        fail("test_success fail");
    }
}

6. TestName
- 테스트 메소드명을 얻을 수 있다.
package com.example.myapplication;

import org.junit.Rule;
import org.junit.Test;
import org.junit.rules.TestName;

import static org.hamcrest.MatcherAssert.assertThat;
import static org.hamcrest.Matchers.is;

public class MyTest {
    @Rule
    public final TestName name = new TestName();

    @Test
    public void testA() {
        assertThat("testA", is(name.getMethodName()));
    }

    @Test
    public void testB() {
        assertThat("testB", is(name.getMethodName()));
    }
}
7. Timeout
- 하나의 테스트가 통과하기 위한 timeout 설정할 수 있다. (vs @Timeout)
package com.example.myapplication;

import org.junit.Rule;
import org.junit.Test;
import org.junit.rules.TestName;
import org.junit.rules.TestRule;
import org.junit.rules.Timeout;

import static org.hamcrest.MatcherAssert.assertThat;
import static org.hamcrest.Matchers.is;

public class MyTest {
    public static String log;

    @Rule
    public final TestRule globalTimeout = Timeout.millis(20);

    @Test
    public void testInfiniteLoop1() {
        log += "ran1";
        for(;;) {}
    }

    @Test
    public void testInfiniteLoop2() {
        log += "ran2";
    }
}

8. ExpectedException
- 예외 직접 확인할 수 있다. (vs @Expected)
- Error 메시지도 검증이 가능하다.
package com.example.myapplication;

import org.junit.Rule;
import org.junit.Test;
import org.junit.rules.ExpectedException;

import static org.hamcrest.core.StringStartsWith.startsWith;

public class MyTest {
    @Rule
    public final ExpectedException thrown = ExpectedException.none();

    @Test
    public void throwsNothing() {

    }

    @Test
    public void throwsNullPointerException() {
        thrown.expect(NullPointerException.class);
        throw new NullPointerException();
    }

    @Test
    public void throwsNullPointerExceptionWithMessage() {
        // NullPointerException이고
        // happend가 포함되고 What로 시작하는 exception message 여야한다.
        thrown.expect(NullPointerException.class);
        thrown.expectMessage("happened?");
        thrown.expectMessage(startsWith("What"));
        //
        throw new NullPointerException("What happened?");
    }
}
9. ClassRule
- TestSuite의 클래스마다 적용할 수 있는 Rule입니다.
package com.example.myapplication;

import org.apache.maven.settings.Server;
import org.junit.ClassRule;
import org.junit.rules.ExternalResource;

@RunWith(Suite.class)
@SuiteClasses({A.class, B.class})
public class MyTest {
    public static final Server myServer = new Server();

    @ClassRule
    public static final ExternalResource resource = new ExternalResource() {
        @Override
        protected void before() throws Throwable {
            myServer.connect();
        };

        @Override
        protected void after() {
            myServer.disconnect();
        };
    };
}
출처
https://junit.org/junit4/javadoc/4.12/org/junit/ClassRule.html
https://beomseok95.tistory.com/300
https://nesoy.github.io/articles/2018-12/Junit-Rule
반응형
'Applied > Unit Test' 카테고리의 다른 글
| Spy에 대한 몇가지 예제 (0) | 2021.02.07 |
|---|---|
| 블랙박스 테스트, 화이트박스 테스트 개념 (0) | 2020.04.27 |
| [Robolectric] robolectric shadow bitmap 관련 참고 코드 (0) | 2020.04.21 |
| [Robolectric] Robolectric을 이용한 Parameterized testing (0) | 2020.04.17 |
| [JUnit] exception 테스트 하는 방법 (0) | 2020.03.01 |